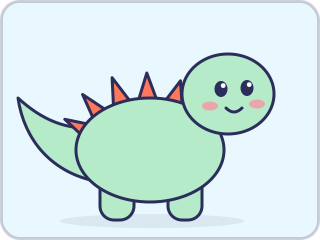
A friendly dinosaur like Doodle, the mint dino in our games, can be drawn with shapes your child already knows: an oval, a circle, triangles and rounded rectangles. That makes it a good first “how to draw” for kids 4 to 8. This guide breaks it into six steps. In each picture, the new part is in color with a yellow glow, and the parts drawn before it are pale.
What you need
- Paper. Any paper works. A big sheet gives small hands room.
- A pencil for the first shapes. Light lines are easy to rub out or draw over.
- Crayons, markers or paint for the end. Green and orange match Doodle, but any colors work.
Before starting, say the plan out loud: “First a body, then a head, then a tail.” Children like knowing what comes next.
Six steps to draw a dinosaur
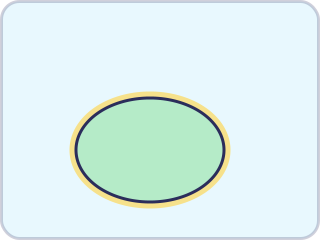
Step 1: a big oval body
Draw a big oval lying on its side, like an egg on a table, a little below the middle of the page. Leave space on the right for the head and on the left for the tail. Big is better here: a body the size of a hand leaves room for spikes and a face later.
Step 2: a round head
Draw a circle at the top right of the body, so the two shapes overlap a little. The overlap means there’s no neck to worry about. A big round head helps a dinosaur look friendly rather than fierce.

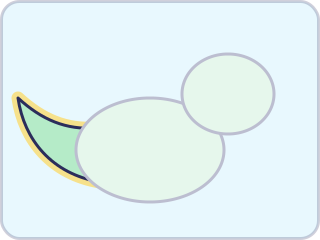
Step 3: a tail
From the left side of the body, draw two curved lines that meet in a point, like a long, bendy triangle. Start both lines on the body and stop where they meet. A tail that curves up looks happy. One that curves down looks sleepy, and both are fine.
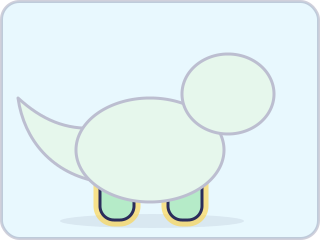
Step 4: legs
Under the body, draw two short, fat legs: rectangles with round bottoms, one near the front and one near the back. From the side, you only see two legs, so two is plenty. Leave a gap between them so the dinosaur doesn’t look like he’s standing on a box.
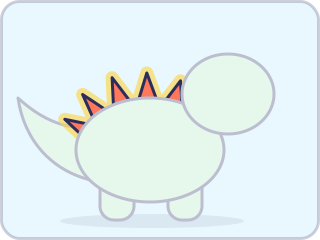
Step 5: spikes
Draw triangles along the top of the back, from just behind the head down toward the tail. Make the middle ones the biggest and the ones at each end smaller. Ours has five, in coral orange like Doodle’s, but three or ten are just as good. Count them out loud as you go.
Step 6: a face, then color it in
Give the head two big dots for eyes, leaving a tiny white spot in each one so they shine. Add a curved smile and two pink cheeks. A friendly dinosaur needs no teeth. Then color it in: mint or green for the body, head, tail and legs, and orange for the spikes.
Tips for little hands
- Trace it in the air first. Draw each shape with a finger in the air or on the table, then on paper. It’s a free practice run.
- Press lightly with the pencil. Light lines can be fixed. Go over the ones you like with a crayon or marker at the end.
- Tape the paper down. Two pieces of tape stop the sheet from sliding while your child draws curves.
- Share the job with a 4-year-old. You draw the oval and the circle, and your child adds the tail, legs, spikes and face. Next time, swap.
- Try paper shapes. Cut out an oval, a circle and some triangles, and let your child arrange and glue them. It’s the same dinosaur without the pencil.
- Keep the wobbles. A wobbly line is still a dinosaur. Ask “What’s his name?” rather than fixing a line.
Make it your own
Once the six steps feel easy, change one thing at a time:
- Colors. A purple dinosaur, rainbow spikes, spots, stripes or a pale belly. No one knows for sure what color most dinosaurs were, so there are no wrong answers.
- Hats and things to wear. A party hat is one more triangle on the head. A crown is a zigzag. Add a scarf, a bow tie, glasses or a backpack.
- Different dinosaurs. Stretch the head up on a long neck for a long-necked dinosaur. Add three horns to the head and a frill behind it for a triceratops look. Swap the spikes for big plates, like a stegosaurus.
- A place to live. Draw a volcano, a sun, some eggs in a nest, a puddle to splash in or a trail of footprints behind him.
Drawing on a screen
In the Little Paper app for iPhone and iPad, Art studio is a big blank page with crayon, pencil, marker, paint, rainbow and glitter brushes, plus stamps. Your child can mix their own green, undo a step, and then press Play to watch the picture draw itself again, stroke by stroke. A dinosaur drawn in these six steps plays back in the same order. Art studio is always free, and it works with fingers or Apple Pencil.
Drawings save in My art on the device, and Paper theater can bring one onto its little stage, where it dances to music and marches in a parade.
More dinosaur fun
- Doodle dino run. Help Doodle jump rocks and puddles and grab stars, with an Easy way to play for the youngest.
- The dinosaur dot to dot. 28 dots, counted by 1s, 2s, 5s or 10s, with a coloring page to print. Our dot to dot guide explains how to pick the right one.
- The dinosaur color by number. Match each number to its color, on screen or on paper, in three sizes.
For more to do with a pencil, see our guide to printable mazes.