
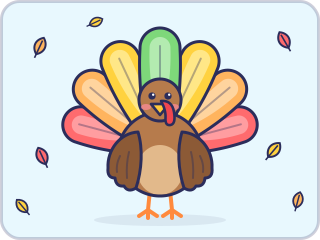
A turkey is one of the friendliest things to draw in November: a round body, a round head and a big fan of feathers, almost all of it made from circles and U shapes. This guide shows how to draw a turkey for kids in six steps. There’s also a hand turkey for 3- and 4-year-olds, and three more ideas for when the first turkey feels easy: a thankful turkey, a turkey in disguise and a pumpkin in three steps. Each step’s picture shows the new part in color with a yellow glow, and everything drawn earlier is pale.
Before you start
You need paper, a pencil and something to color with. Red, orange, yellow and brown cover most of a turkey, and any other color can join the feathers.
Warm up with the shapes inside this turkey: circles in two sizes, and U shapes turned upside down. The beak is a small triangle, and triangles usually come later than circles. A table of typical ages from Somerset NHS Foundation Trust’s children’s therapy service puts copying a circle at about 3 years old and a triangle at about 5¼. A round beak at 4 is fine, and so is a wobbly circle.
Six steps to draw a turkey
Step 1: a round body
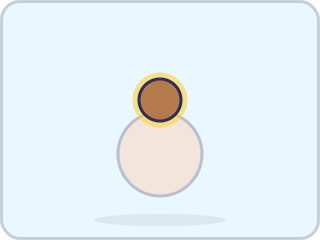
Draw a big circle a little below the middle of the page. Leave plenty of room above it and on both sides, because the feathers will fan out there later.

Step 2: a small round head
Draw a smaller circle on top of the body, overlapping it a little, like a snowman’s head. The overlap means there’s no neck to worry about.
Step 3: a fan of feathers
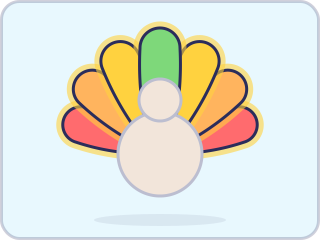
Now the fun part. Behind the head, draw a tall upside-down U for the middle feather: start on the turkey’s outline, go up and around, and come back down to the outline. Then add feathers in pairs, one on each side, each leaning a little further out than the last, until the fan reaches the sides of the body. Starting and stopping every feather on the outline means nothing crosses the turkey. Ours has seven feathers. Five is plenty for a 4- or 5-year-old.
Step 4: a face
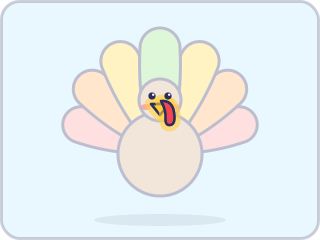
Near the top of the head, draw two eyes and leave a tiny white dot in each, so they shine. Below them, draw a small triangle pointing down for the beak. Then add the snood: a long, floppy red drop that starts at the top of the beak and hangs down beside it. Real turkeys have one too. Pink cheeks are up to your child.
Step 5: wings
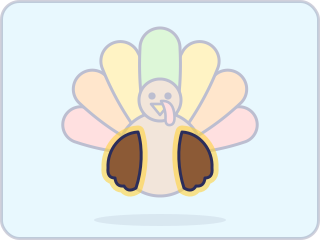
On each side of the body, draw a wing like a big raindrop: pointed at the top and round at the bottom, with a wavy bottom edge for the feather tips. Let each wing overlap the body’s outline a little, so it looks attached.
Step 6: legs, feet and color
Under the body, draw two short legs, and at the bottom of each add three toes that spread out like a bird’s footprint. Then color it in: brown for the body, head and wings, a lighter belly, bright feathers, a yellow beak, a red snood and orange legs. A line down the middle of each feather makes it look more like a real feather, and a few falling leaves finish the picture.
A hand turkey, for little ones
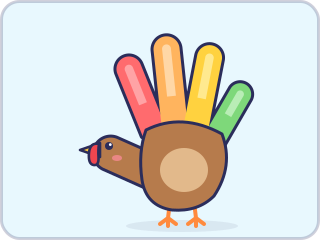
Six steps can be a lot at 3 or 4. A hand turkey takes one. Your child spreads their fingers on the paper and you trace around their hand with a pencil, or you swap and they trace yours. It tickles either way. The thumb becomes the head and neck, the four fingers become feathers and the palm is the body. Add an eye, a beak and a red snood on the thumb, two legs under the palm, and a different color for each finger.
Write the date on the back. A hand turkey every November is a simple way to see how much a hand grows in a year.
Coloring a turkey
A kids’ turkey is usually as bright as a new box of crayons, and that’s a fine way to color one. If your child wants to know what real wild turkeys look like:
- Mostly dark brown. New York’s Department of Environmental Conservation describes the males, called toms or gobblers, as dark black-brown. The females, called hens, are smaller, with a rusty-brown body and a blue-gray head (Wild Turkey).
- A head that changes color. A tom’s bare head can shift between red, white and blue as his mood changes. The National Wild Turkey Federation says scientists still don’t fully understand what each color means (Wild Turkey Anatomy). The same article explains that the snood is the flap that dangles over the beak.
- Feather tips by family. Depending on the kind of wild turkey, the tips of the tail feathers are brown, tan or almost white, the federation’s article says.
- Far more feathers than seven. A grown-up wild turkey has 5,000 to 6,000 feathers, according to the U.S. Fish and Wildlife Service (Eight wild facts about wild turkeys). Seven is plenty for a drawing.
For a warm turkey brown, try coloring the body orange first, then going over it lightly in brown.
Tips for little hands
- Trace the circles. A mug makes the body and a bottle cap makes the head. Tracing saves your child’s patience for the feathers.
- Build the fan from the middle. One feather straight up first, then one on each side, then one more on each side. Working in pairs keeps the fan even.
- Color a pattern. Red, orange, yellow, red, orange, yellow: a repeating pattern on the feathers is a quiet way to practice patterns. Ask what color comes next.
- Say the order out loud. “Body, head, feathers, face, wings, feet.” Next time, your child can say it to you.
- Keep the surprises. A lopsided fan looks windy, and a feather that comes out extra long is just showing off.
- Draw the real thing (ages 7 and 8). Look at photos of wild turkeys together: the long neck, the small bare head and the long legs. Toms also have a beard of hair-like feathers on the chest, New York’s wildlife page notes. Then draw one walking, from the side.
Make it your own
A thankful turkey
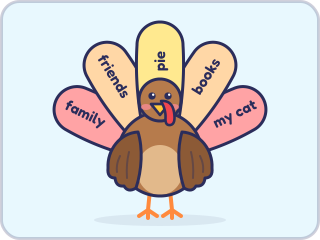
Draw the turkey with five big, pale feathers, and write one thing your child is thankful for on each. Little ones can tell you the words for you to write, or draw a tiny picture on each feather instead. Make it in the week before Thanksgiving and stand it on the table.
A turkey in disguise
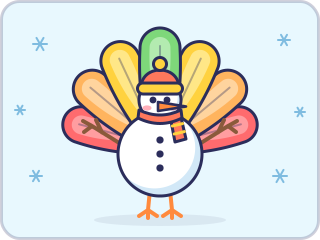
Some schools send this one home as a November family project: the turkey dresses up so nobody finds it before Thanksgiving dinner. Ours is hiding as a snowman, with a woolly hat, a scarf, a carrot nose, coal buttons and stick arms. Only the feathers and the orange feet give it away. What else could your turkey be? A cat, a dinosaur, an astronaut or a pumpkin all work. For older kids, add a speech bubble: what does the turkey say when someone looks twice?
The picture book Turkey Trouble by Wendi Silvano, illustrated by Lee Harper, is about a turkey who tries on one disguise after another. Read it first, and your child may start drawing with a costume already in mind.
Nine more turkey disguise ideas. Each one starts from the same turkey. Draw the body, the head and the feathers in pencil first, then dress it up and leave the beak, the feathers and the feet showing, because the joke is that everyone can still tell.
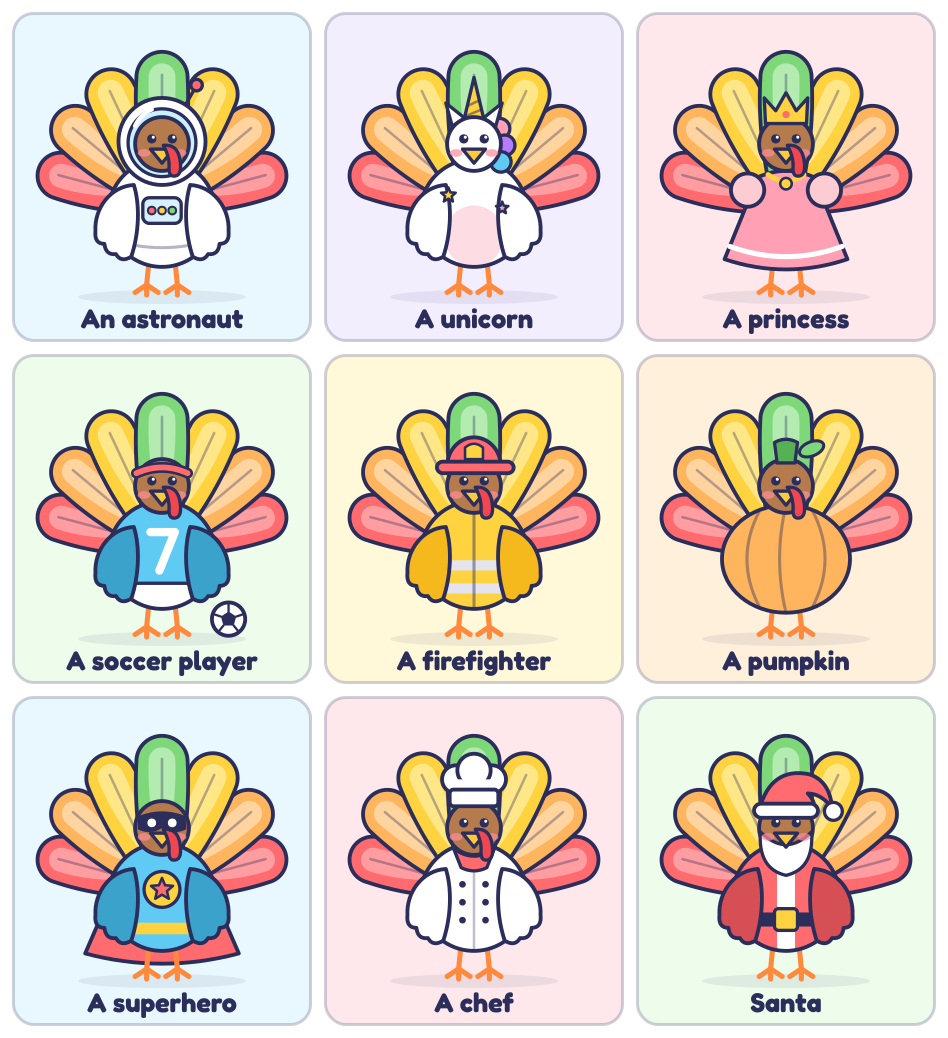
- An astronaut. Color the body white, draw a big circle around the head for the helmet, and add a small box of buttons on the chest.
- A unicorn. A white body and head, a yellow horn, two pointed ears and a mane of three colored puffs. The feathers are already a rainbow.
- A princess. A pink dress shaped like a bell, puffy sleeves, a necklace and a crown with five points.
- A soccer player. A shirt with a big number, white shorts across the bottom of the body, a headband and a ball by the feet.
- A firefighter. A yellow coat with two pale stripes and a red helmet with a wide brim.
- A pumpkin. Draw a wide pumpkin where the body was, with curved lines down it, and give the head a green stalk and a leaf for a hat.
- A superhero. A mask over the eyes, a cape behind the body, a star on the chest and a belt.
- A chef. A white coat with two rows of buttons, a red neckerchief and a tall puffy hat.
- Santa. A red coat with a white stripe and a black belt, a white beard under the beak and a red hat with a pompom.
Need a turkey to dress up? The turkey in our Thanksgiving coloring pages has a plain round body, so it prints as a ready-made turkey disguise template.
A pumpkin in three steps
- Draw a wide, round shape with a small dip in the middle of the top.
- Draw two curved lines inside it, like a pair of brackets, from the dip down to the bottom.
- Add a short stem in the dip, a leaf and a curly vine, then color the pumpkin orange.
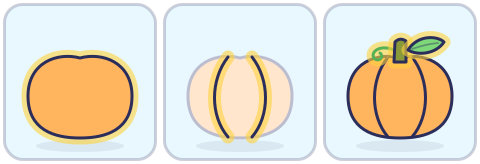
Pumpkins grow on long vines that creep along the ground, which is why ours has a curl of vine. Draw a few in a row for a pumpkin patch beside the turkey.
A turkey on a screen
Seen from the front, a turkey matches on both sides, so it’s a good one for Mirror magic in the Little Paper app for iPhone and iPad: draw the feathers, a wing and a foot on one half of the page, and the other half draws itself to match. For the six-step turkey with leaves and a pumpkin patch around it, Art studio has a big blank page with crayon, marker and paint brushes, and its Play button redraws the picture stroke by stroke. Both are always free.
More to draw and play
- Thanksgiving coloring pages. Eight free pages to print, including this turkey ready to color, a thankful turkey and a kids’ table placemat.
- The pumpkin dot to dot. Join 17 dots to find a smiling pumpkin, on screen or on paper.
- Color by number. Match each number to its color, from a sunflower to an owl, on screen or printed.
- How to draw a snowman. The next drawing after Thanksgiving: three circles, a woolly hat and a carrot nose.
- How to draw for kids. All our step-by-step drawings in one place, with tips for drawing together.


