
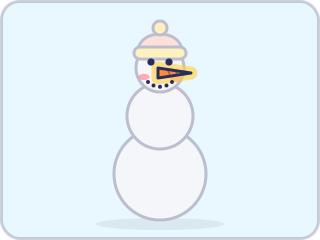
A snowman might be the easiest drawing there is: three circles stacked up, then a hat, a face and a few lines. That makes it a good winter drawing for kids 4 to 8, and a gentle start for a child who says they can’t draw. This guide shows how to draw a snowman for kids in six steps, how to make a white snowman show up on white paper, and three more ideas: a snowman family, a melting snowman and a six-armed snowflake. Each step’s picture shows the new part in color with a yellow glow, and everything drawn earlier is pale.
Before you start
You need paper, a pencil and something to color with. A white snowman hardly shows on white paper, so pick a blue or gray pencil or crayon for the outline, or plan to color the sky around him (more on that below).
Circles are one of the first shapes children learn to copy. In a table of typical ages from Somerset NHS Foundation Trust’s children’s therapy service, it comes at about 3 years old. Wobbly snowballs are fine. Real ones aren’t round either.
Six steps to draw a snowman
Step 1: a big snowball
Draw a big circle near the bottom of the page. This snowball holds everything up, so make it the biggest, and leave plenty of room above it.

Step 2: a middle snowball
Draw a smaller circle sitting on top of the first. Start on the big snowball’s line, go up and around, and stop when you reach the line again, so nothing crosses the snowball underneath.

Step 3: a small head
Add the smallest circle on top for the head, the same way: start and stop on the middle snowball’s line. Now there are three snowballs, from big at the bottom to small at the top.

Step 4: a woolly hat
On top of the head, draw a half circle like a dome. Draw a flat band across the bottom of it, a little wider than the dome, and a small ball on top for the pompom. For a top hat instead, draw a tall rectangle standing on a flat brim.

Step 5: a carrot nose and a coal face
In the middle of the head, draw a long, thin triangle pointing sideways for the carrot nose. Add two dots above it for eyes, and a smile made of small dots, like pieces of coal.
Step 6: arms, buttons and a scarf
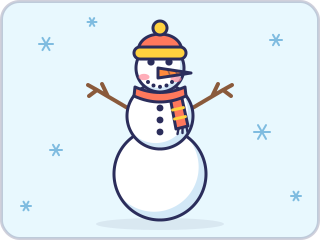
From each side of the middle snowball, draw a stick arm going up and out, with a small twig partway along and two more at the end, like fingers. Put three dots down the front for buttons. Then wrap a scarf around the neck: a curved band, with one end hanging down. Color it in, and add a few snowflakes.
Coloring a white snowman
Snow is white and so is most paper, so a snowman needs a little help to stand out:
- Color the sky. Light blue all around makes a white snowman pop. Gray works for a snowy day, and dark blue for a snowman at night.
- Shade one side. Decide where the sun is, then add a little light blue to the side of each snowball that faces away from it. It’s a first lesson in shadows, and it makes the snowballs look round. Our pictures shade the lower right.
- Put the color in the extras. The hat, scarf and carrot are where the bright colors go. Red, orange and yellow look warm against all that blue.
- Leave snow on the ground. Keep a white strip along the bottom of the page, with a blue line or two for drifts.
Why is snow white in the first place? The National Snow and Ice Data Center explains that clean snow reflects most of the sunlight that reaches it, because its ice grains scatter a lot of light (the science of snow).
Tips for little hands
- Trace three circles. A mug, a jar lid and a bottle cap make a big, a middle and a small snowball. Tracing them keeps the snowman tidy and saves the drawing for the fun parts.
- Talk about sizes. Big, middle, small, then biggest and smallest. Ask which snowball is the biggest and which is at the top.
- Let it lean. Real snowmen lean, sag and lose buttons. A lopsided one looks more real, not less.
- Make it fluffy. Glue cotton balls inside the outline, or dab white paint on colored paper with a sponge, for a snowman you can touch.
- Add a scene (ages 7 and 8). A house with a smoking chimney, pine trees, a sled or footprints leading up to the snowman. Ask where the snowman is and who built him.
Make it your own
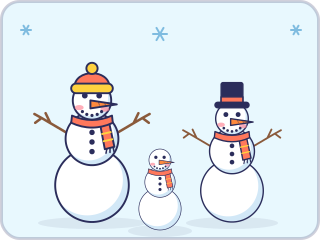
A snowman family
Draw three snowmen side by side: a big one, a middle-sized one and a little one. Give each a different hat, such as a woolly hat, a top hat or no hat at all. Who’s who is up to your child, and every family looks different.
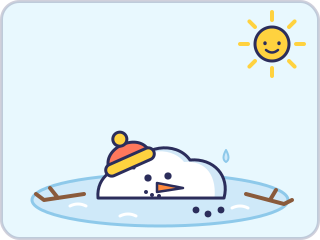
A melting snowman
For a funny one, draw what’s left after a sunny day: a puddle, a lump of snow with a face, the hat sliding off, the carrot, the coal buttons and the sticks floating around. Ice and snow melt at 0 °C (32 °F), so it’s a good drawing for the end of winter, and a good way to talk about warm and cold.
A snowflake in three steps
- Draw three straight lines that cross in the middle, like a star with six arms.
- Near the end of each arm, add a small V pointing out.
- Add a smaller V lower down on each arm, and a dot in the middle.
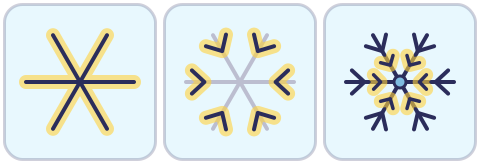
Real snowflakes have six sides or six arms too. A chemist at the University at Buffalo explains why: the water molecules in a snowflake join up in rings of six as they freeze. No two flakes are exactly alike, because each one grows through slightly different temperature and humidity on its way down (No two snowflakes are alike. But why?). On a snowy day, catch a few on a dark mitten and count the arms.
A snowman on a screen
In the Little Paper app for iPhone and iPad, Art studio has a glitter brush for sparkly snow next to its crayon, marker and paint, and pressing Play redraws the snowman stroke by stroke, snowball by snowball. A snowflake is made for Mirror magic: draw the arms on one half of the page, and the other half draws itself to match. Both are always free.
More winter fun
- The snow maze. Help Doodle, in his warm scarf, find the way through walls of ice to the star, with presents in the dead ends. It prints in three sizes, each with its answer.
- Doodle dino run. Run far enough and the world turns snowy: the snow world starts at 800 m.
- How to draw a cat. Add a scarf and a woolly hat for a winter cat.


